When creating a hull mesh don't do the noob thing by copying your model and overlaying it on top and just renaming it as collision.
The game engine checks the hull instead of the model and reports back if anything has collided with it, if something is close enough to "do something" etc. etc.
The hull in a lot of games is the thing that stops you walking through walls, falling through the floor or allows you to interact with an item.
Rules I follow;
1. KISS - Keep It Simple Stupid.
2. Make sure it is just one mesh unless it's massively complicated.
Basically you are making a silhouette of your model and not a complicated, intricate shape that will cause the engine to have to check more than it needs to to make the collision decision (I like that!)
What you need;
Greatness7's awesome script
The latest Blender from here
Using Greatness7's awesome nif script add-on for Blender life couldn't be simpler for adding your hull.
If you are importing your mesh and hull from something else such as Wings/ 3DS Max/ Maya then that is your first port of call.
I'm going to add the hull mesh to a model I made in Wings3D. It's all prepped with it's individual meshes for each texture and it has a hull mesh.

As you can see once it's loaded in (this is a huge mesh) the individual groups are listed on the top right section.
Now go ahead and press Shift + A.
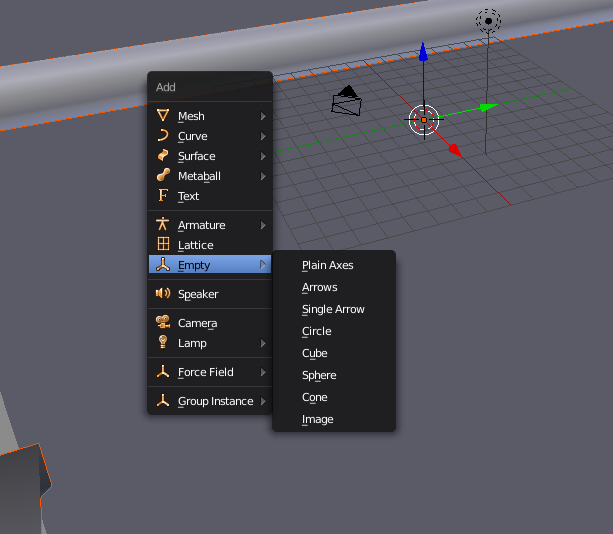
A menu will appear and we want to scroll down to "Empty" then select "Plain Axis".

As you can see in the top right hand corner we have our list and the new plain "Empty" is selected.
Now double click it and rename it to "Collision".
My hull mesh is easy to see here as I have given it a sensible name. "Hull_gov". We now need to drag the hull mesh over the "Collision" and drop it in there like so....
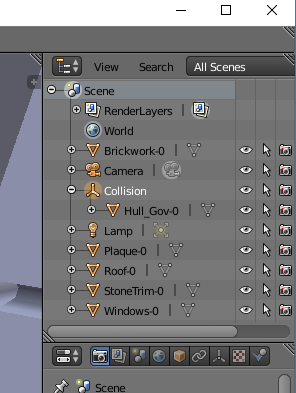
You can now click the little "+" icon in front of "Collision" to make sure your hull is in the right place (Yes. I have fucked up before I dropped it in one close to it).
That's it! Once you export the nif Greatness7's jiggery pokery takes over and voila. Your nif has all the necessary collision bumf that a nif needs.
Before we export this model as a nif we need to translate it. Press "A" to select all the model then ctrl + A to bring up the menu and select "Rotation and Scale".
Now we can export your first NIF.


No comments:
Post a Comment