
Luckily we have the worlds simplest table to map out and we're only going to use one texture for it and I'm also going to show you how to speed map.
First things first. If you are going to use one of the textures from Morrowind and it is a DDS you will first need to convert it to PNG or JPG for Wings to be able to use it. If you want to make a whole new texture of your own just make sure it isn't an odd size. In fact. For now. Stick to a sensible size such as 1024 x 1024.
For this table I'm going to use this;

If you want to use the same one then just right click the texture and save as....you know the rest.
Let's open our table model once again or re-make it. Either way it shouldn't take you long.
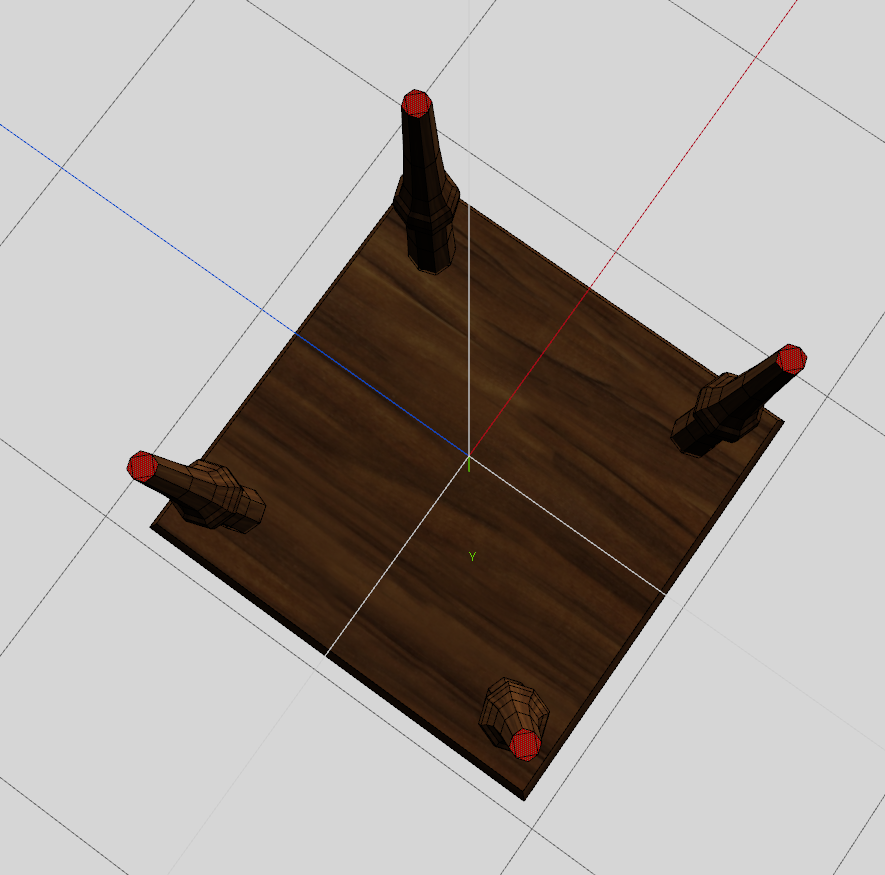
Jut as a quick recap. Here it is in 2 minutes.(I can do it in 1 but then what would you see?)
Now you are all caught up with me we can begin our wondrous journey into the land that time forgot....erm. I mean UV mapping.
Now we have our table in front of us and our texture nice and ready somewhere on our hard drive we can begin.
File -> Import Image -> "select the texture you want"
Now
Windows -> Outliner
This will bring a big dumb box up that you will need to resize to where it is comfortable for you. Do that now.
If everything is in order you should be looking at this;
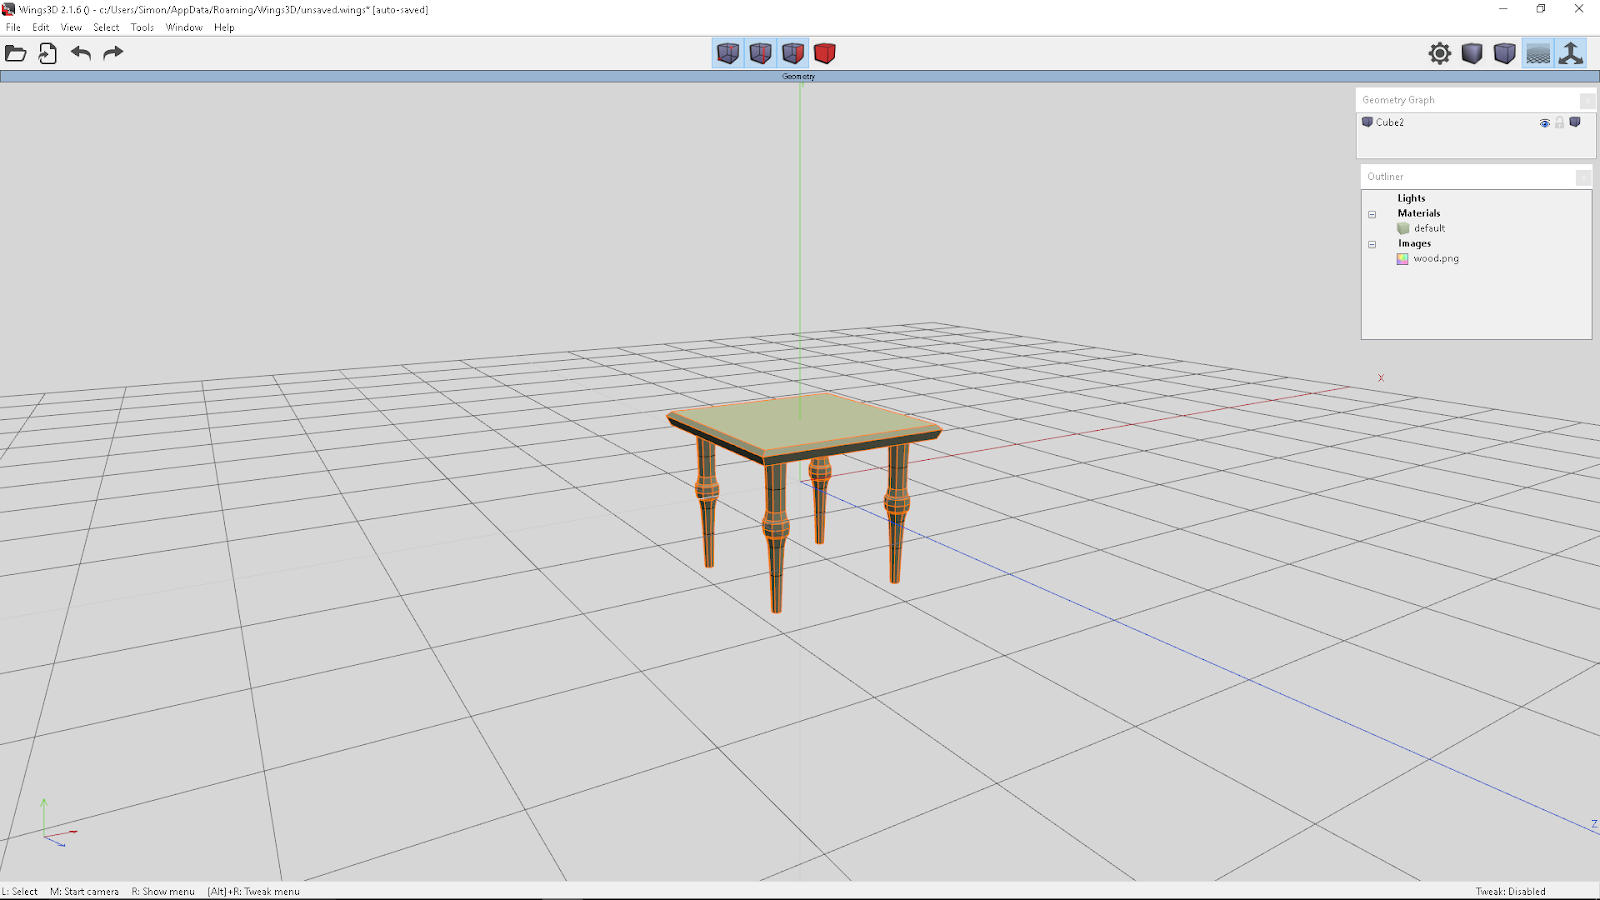
If you're not then re-trace your steps because you're a tit.
Now. Last time I used the Auto-Smooth command so you could see what was going on and have a better idea of the definition your model would have. We now want to remove the auto-smoothing before we even think about UV mapping or everything will go tits up!!
With the Body tool selected highlight the entire model and then right click, Auto-Smooth -> Gear wheel -> 100
If you've done it right then you wont see any orange lines anywhere on the model. (This is called teaching by making you do stuff then undo it 100x until you get it).
Now the fun part. Using the face tool I want you to drag a box around just the legs of your table (don't include the bottom feet).
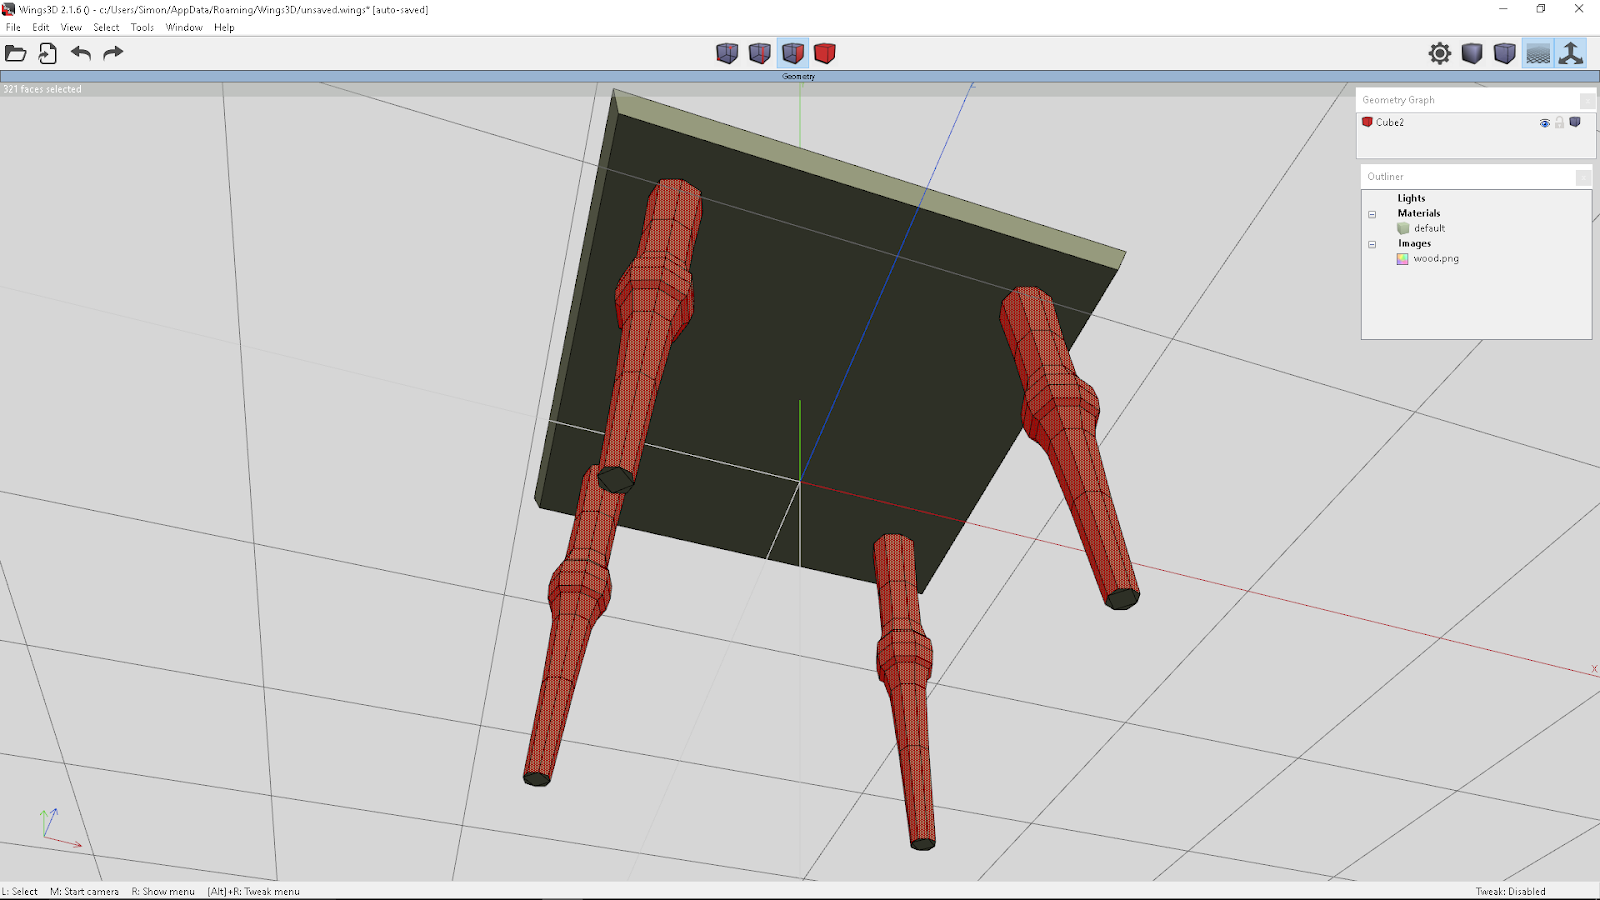
What we have here are four tubes in reality and this is how you map things. You have to look at them as different parts of the model in their own right. This model is comprised of four tubes and a box.
Now right click and right at the bottom of the list is UV Mapping. Select it.

The mapping window will pop up with just your legs in there. Now. The fun part. Wings can't map those tubes because it can't figure out where they start or where they end so we have to tell it.

Select the top edges as above and press "L". This will mark out an edge loop from top to bottom for you. Now right click and select "Mark edges for cut"
If you now press the space bar to de-select you will notice that the edge has turned orange and now Wings knows where to start it's unwrapping.
Right click again and select "Continue" -> "Cylindrical map". This will unroll the legs for you and present you with this display.

What we're going to do here is to make them all the same. Right click -> Scale -> Max Uniform
This will centre your legs one on top of the other. Your model will show that fugly alphabet soup right now so it's time to give it some texture loving. Right click again and "Create Texture"
The box that pops up has all sorts of things on it and you would usually use them for "Baking", something that we might cover at a later date. For now we just want the top two.
Click the "Background" options tab and select your image from the drop down menu and ok it.
Under that there will be something saying "Draw Edges", click that and chose "None" and ok the whole box.
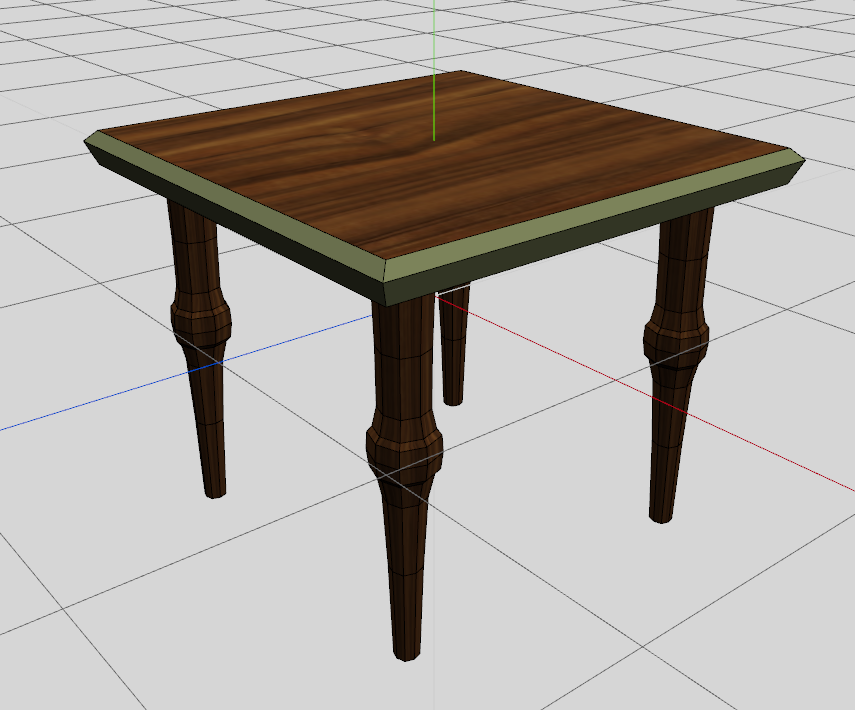
Close the UV window and press space to check out the texture on your model thus;

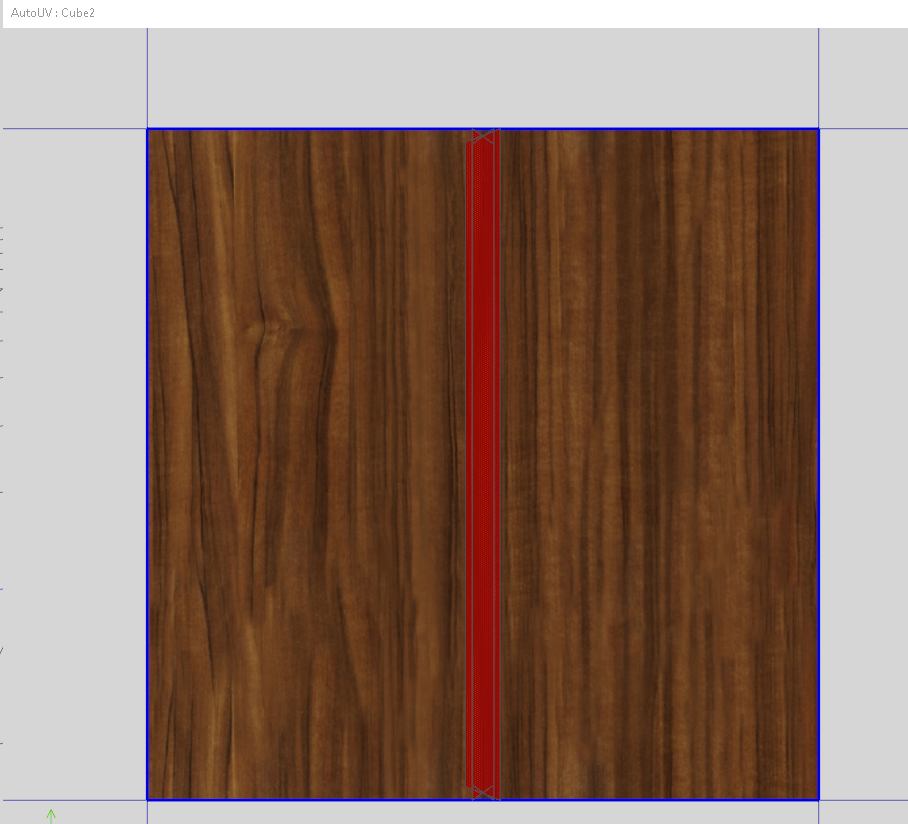
Disaster strikes!! The grain of the wood is obviously going in the wrong direction. Oh no! What can we do?
Re-select the legs again and right click menu to UV mapping. You are presented with the map of your table legs already selected on the map.
Right click. Rotate then hold down the shift key and move your mouse to rotate the map until you have turned it 90 degrees. Close the UV window and check out your model again. Phew! All ok now.
So we have legs. What about the top? Chose the Face tool and select the top and underside of your table.
Right click and go to UV mapping.
This time it's easy. Just right click and continue, unfolding. All should be good.
You can close the UV window once again and then we want to highleft the sides all the way around the table top. (Highlight 2, then press the "i" key remember)
Then back to UV mapping from the right click menu we have this;

Just like the tubes (legs) Wings can't figure out where to start and end again so we need to mark out some cuts. Highlight the lot and then select the Edge tool to highlight all the edges.

Now we can mark the edges as before (right click, mark edges for cut). Continue, unfolding.

Ok great. Problem is we have several going one way and two going the other. That will look fucking horrible on the model so we need to press the space bar to de-select the lot and then drag a box around the bottom lot and rotate them as you did before to match the rest. (I'm rotating the bottom ones and not the two vertical ones because they are in line with the grain of the wood).
Once they all face the same direction (with the grain) highlight everything and select the Body tool from the top. Right click, Scale, Max Uniform.
You should have something akin to the above.
Close the window and give your model a good looking at then turn your camera so you are looking at the feet and select one side and press "i" again.
12 faces that you will never ever see. Let's get rid of them to save the engine a little bit of time. Every little helps!
Right click menu, "Hole". This will remove the faces from the model completely.
Now get your camera back in a position that doesn't make you feel dizzy and look at your model again. The texture isn't quite as it should be. With the Face tool selected highlight the whole model and chose UV mapping again. This will put all the parts onto one map for you.

This time we're going to right click, Scale, Max Uniform everything. Right click again. Scale, Normal Sizes.

Now everything is the correct width and size it should be

Turn on smooth shading and get rid of the axis and grid and check out your textured one piece model.
See if you can do better. The knees could do with some loving but I'm sure you get the idea now.
If you like this series then click the Follow button at the top of the page. The more people I see reading the damn thing the more it will encourage me to make more!


No comments:
Post a Comment