
Baking vertex colours simplifies this task enormously by using vertex colours to identify positions on our UV map.
Yes, I made the most simple thing I could think of as an example. This is just a flattened (ish) cube with a few cuts in it.

Now imagine you want the texture on the cube to reflect the positions of the vertices.
First thing we will want to do is add our colours. Open the palette window and highlight the face you want to change colour then select your colour.

Select all those face and right click and select UV mapping from the menu.Continue, unfolding.
Now we have our faces in the UV map we can create our base colour texture. Right click and create texture.
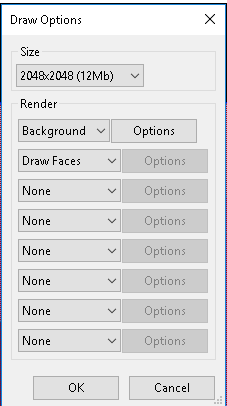
Set your background to a solid colour (I chose white) and in the next drop down menu select "Draw Faces"
and ok.

You can now save your baked UV by right clicking on the UV image and selecting "Make External" and you will have a something you can work with to design your texture exactly to fit your new model.
Simples.


No comments:
Post a Comment