
Part I
Download this for a start; Wings 3D and go make a nice cup of Earl Grey. Hot, while it installs.
Now I assume while I was brewing up you didn't wait for me and have installed and run Wings and you are looking at this or something similar?
First thing I like to do is set up my windows there so they're not in the fucking way like they are when you first open the program. For now you can close the palette and outline window as you're not going to need them at this stage and having those hanging around will just piss you off. As with any normal window you can size the geometry window so it's nice and small and put it somewhere that's comfortable for you. (I'm left handed so top right for me).

I'm sure you've already left clicked everywhere and maybe even right clicked if you're advanced enough? I bet you've even used the bastard mouse wheel and zoomed in and out right?
Did you actually press the mouse wheel down though and spin around the screen? Click the wheel once and it will lock and you can move around the centre point on the screen. Done? Good. Who's a clever fucker then?
Now. Let's right click once and you will see a menu appear. This is your shapes menu. Go head and place a cube on the screen. (Right click, cube, left click, done).

Doesn't look much like a table right now but it's going to be in a few minutes if you fucking listen to me!
(For those that can already model, what I do will look mental but will show how to use different processes and that's why I'm doing it this way so don't be a smart arse).
Right. At the top there are four icons.
Vertice, Edge, Face and "All"
We're going to click on the face icon (3rd one. Pay attention and stop being a twat) and it will be highlighted.
Now left click on the top of your cube on the screen like so ->
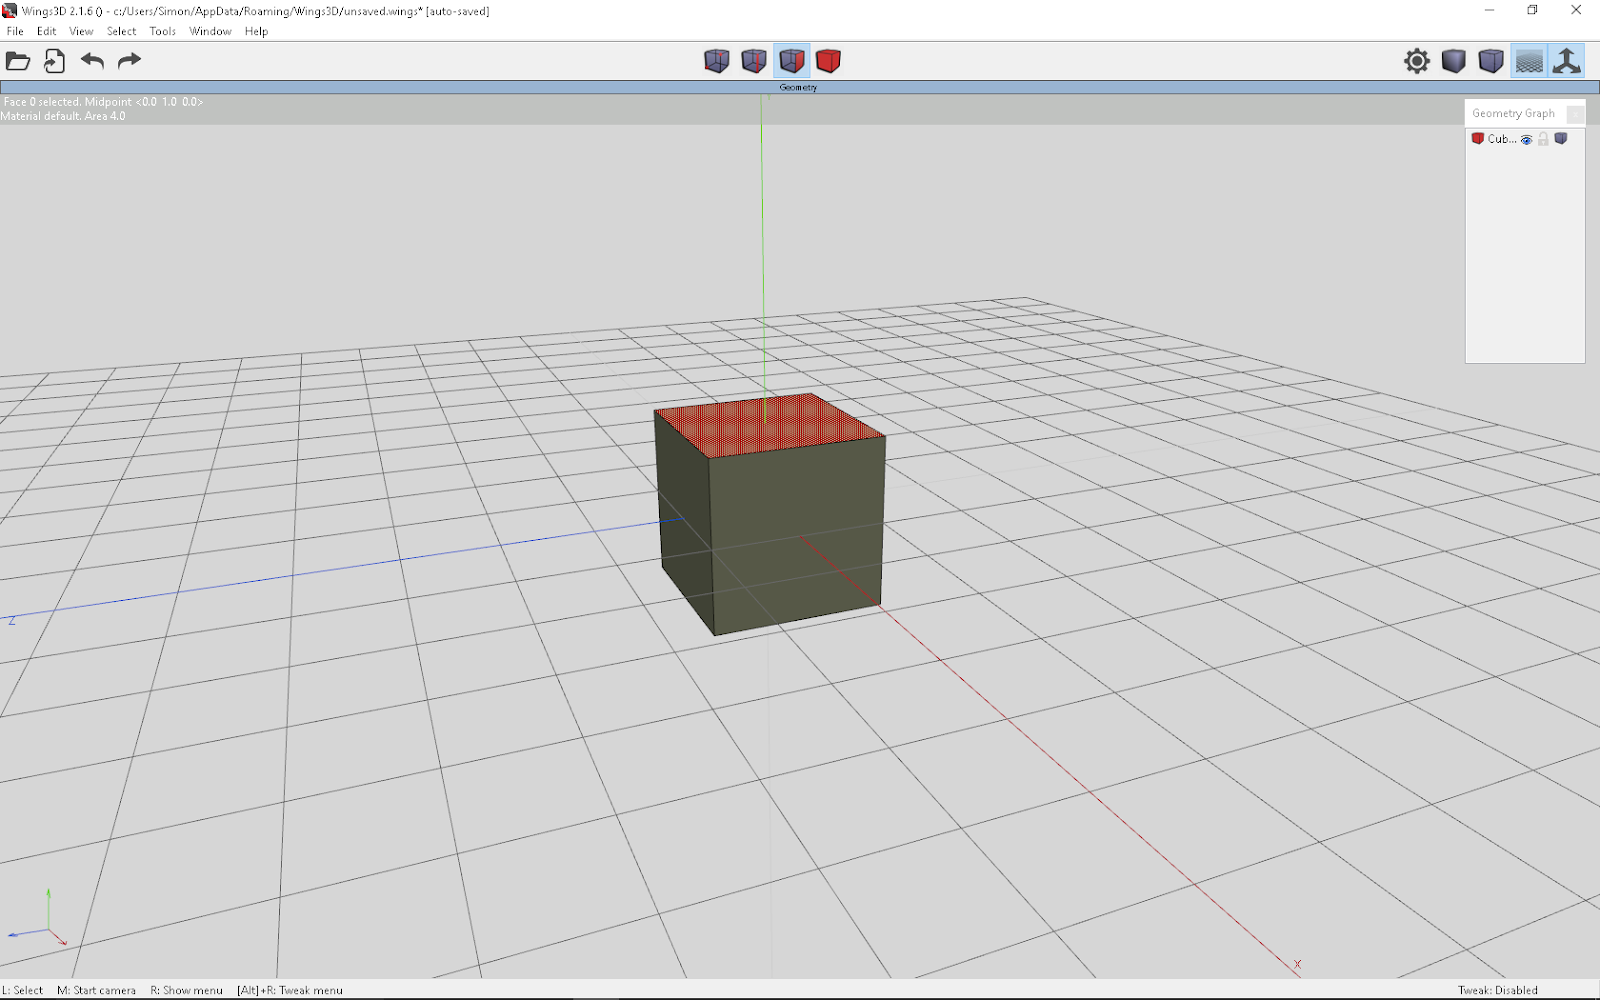
Right click anywhere and select "Move", "Y". Now move your move up and down and the cube should expand/ contract accordingly. Get it to about this size and then left click again.

Press the space bar to de-select the face and then select one of the edges and press "G"
As if by magic the corresponding edges will be highlighted around that directional axis.

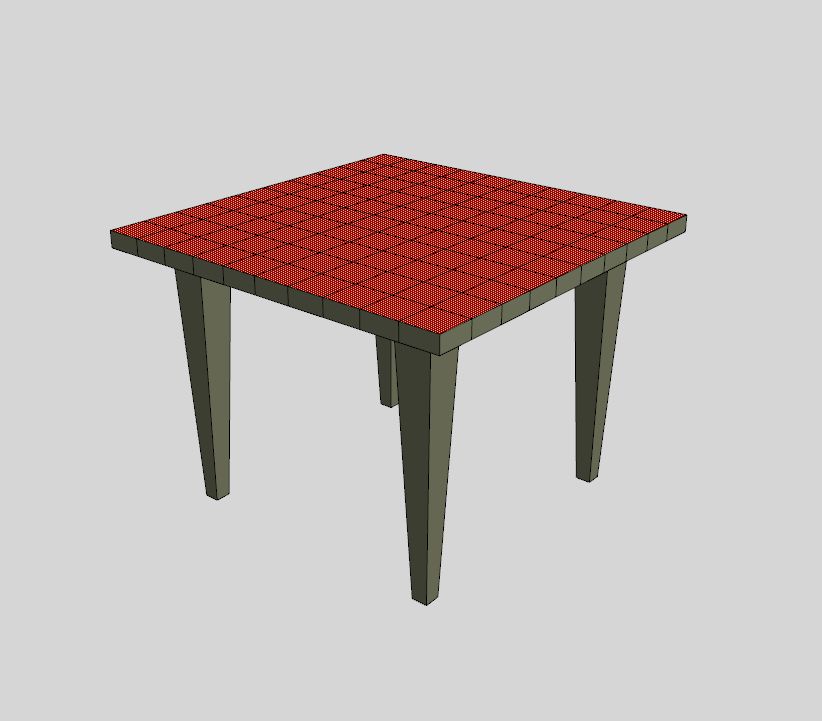
Now we have those edges nicely selected we want to right click again and select "cut". A box will appear asking the number of cuts we want to make and for this we're going to chose 10 (mostly because it's already there). Once you've done that press the "C" key and you should have this;

If you haven't then go to the back of class and ponder for a while why you are such a cunt and can't follow simple instructions. If you do have this then well done! Now you can pause for thought and dip a biccy in your tea.
Now select one of the new edges (any) and press "G" again. (You may need to press space before you do this).

Now repeat the cut procedure as before (Left click -> Cut -> 10 -> Press "C" to connect them)

There is an easy way to have done this right from the start but what the fuck do you learn by doing that?
Ok. Now select the four faces as above. Right click and select "Extrude" then "Y" and move the mouse up so that you have something that resembles legs and left click when you're happy.
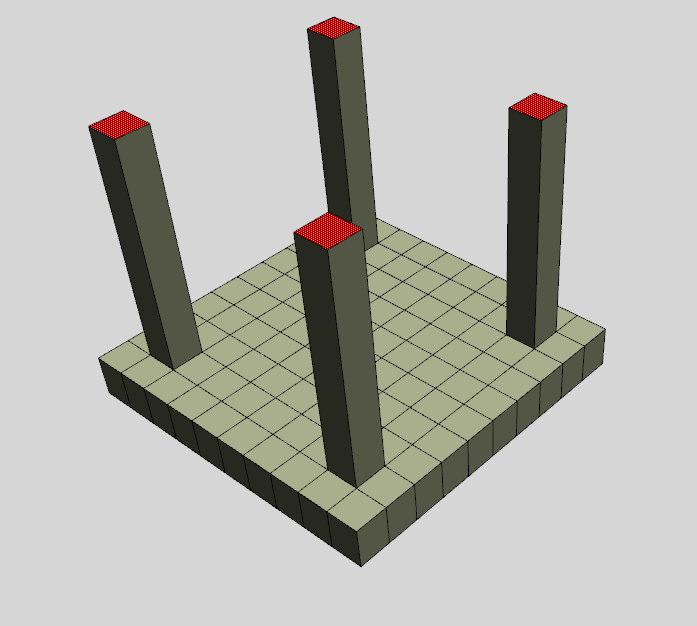
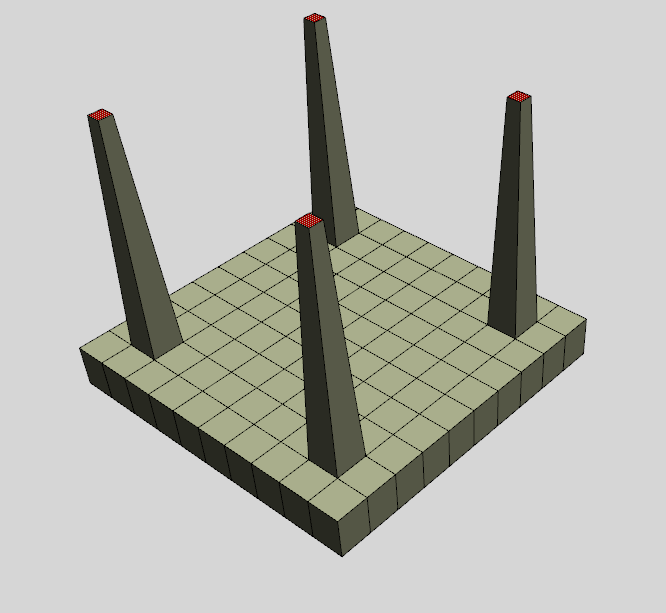
With those faces still selected, left click and select "Scale Uniform" and then move your mouse around until you get something like this; (If you fuck it up remember you can always press ctrl+z and try again)
Not bad I guess. Ok. Now at the top of the screen we want to select the "All" icon.
Once you have your table all in red, left click -> "Flip" -> "Y" and then press "A" to centre the view because of course you moved didn't you?!
Press "Space" to de-select the model.

My table looks a bit on the thick side but that isn't a problem. I have to highlight all those faces on the table surface and then left click -> move -> y to get it something like what I want
Note: You can move left, right, up and down with the cursor keys if you lose the plot.
Just to throw in another useful command or two, highlight the entire model again, Left click -> Auto-smooth. You should see some bright orange lines appear in prominent places around the model. Doesn't seem to do fuck all apart from that until you click this badger.
Now look at your first model. Sexy isn't it?
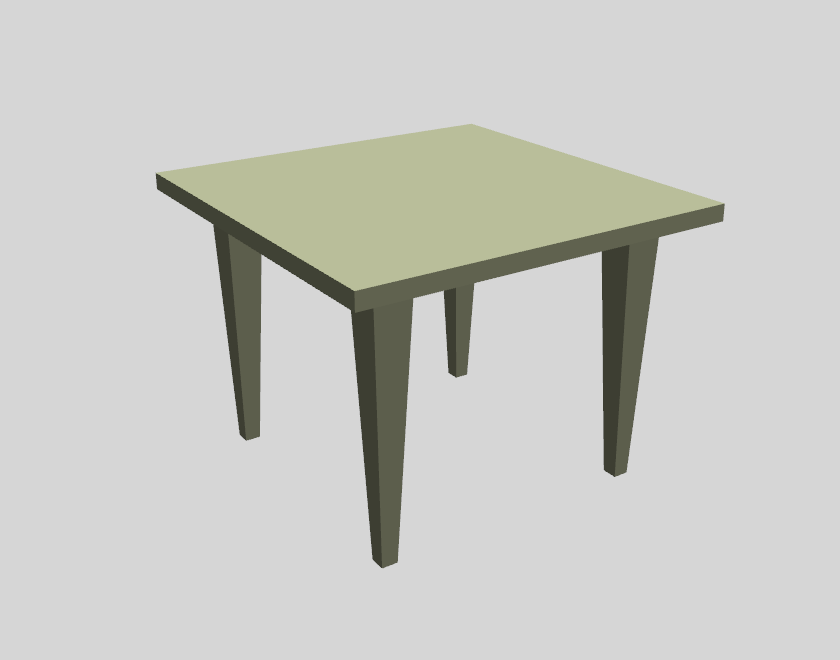
That should have taken you about 5 to 6 minutes. How easy is that?
I hope this very quick and simple model has given you the bug to want to make bigger and better things. In Part II I shall expand some more and add some commands to your repertoire.
For now I have to make lunch before the wife eats me, and not in a good way either.
Part II: Making it look better


No comments:
Post a Comment